I'm so excited to say that my half bathroom is being featured on Remodelaholic today! I'd love for you to check it out! It's a combination of a couple of posts from this blog.
This isn't the first time I've talked about Remodelaholic on this blog. If you're not already following this fabulous blog, you should definitely check it out! It is filled with inspirations from reader submissions to their own fabulous home renovations! Below is a picture of their awesome half bathroom!
Tips for Buying a New Car
A few weeks ago we got the dreaded phone call that a head gasket had blown in our van. We decided it was time to purchase a new van instead of spending $2,300 to repair an eight year old van worth $4,000. The next day, we decided to start shopping. My husband’s theory was to go to the dealership & ask them what their best price was. We would then shop around & purchase the van from whatever dealer would give us the best price.
We drove to the dealer, test drove a van, & sat down to negotiate the price. My husband asked what their best price was, and after the salesman “checked with his manager” came back to tell us he couldn’t give us a price. His explanation was that if they gave us a price & then we went down the road to the next dealership that they would just beat it by $100 & we would get the car from them. Instead of being the first price we got, they wanted to be the last, so they could give us the best deal & we would buy from them.
While this made sense, it left us frustrated. My husband came home & spent several hours researching how the car industry works so he could get us the best deal possible.
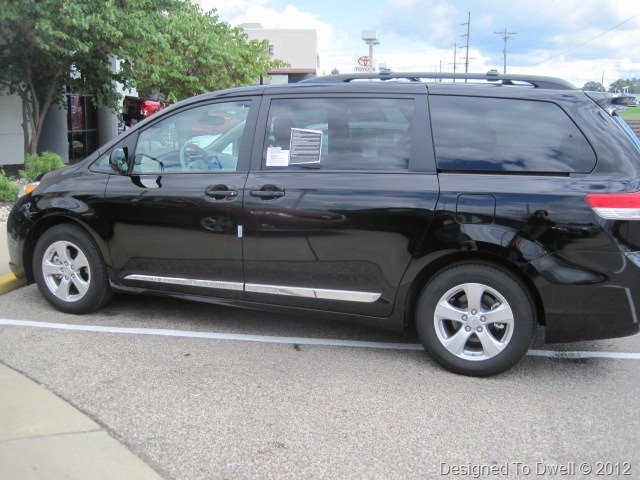
Here are some tips for buying a new car, as well as some things we learned along the way:
1. Choose a car. What type of car do you want? What features are you looking for? Make a list of your “must haves” & then do a search for the “best” car in that category. We wanted a safe van that could seat eight & had two power sliding doors that would hopefully last a long time. Over & over again in our searches, the Toyota Sienna seemed to be the best van to meet our needs.
2. Once you know what model you want, check prices online. Many dealerships list the MSRP, as well as lower online prices. Check out local dealerships online to see their prices, as well as the fair purchase price on Kelley Blue Book’s website. You may even want to print out some of these prices for proof!
3. Learn the value of your trade-in. If you will be trading a vehicle in, check out an estimate of it’s worth at Kelley Blue Book.
4. Consider getting a loan through your bank. Some of our research hinted that when you finance through a dealer, you sometimes pay more than you think you are for a car. Okay, that sounds confusing. Let me explain…When we bought our van eight years ago, we financed through the dealer. We got a great interest rate & negotiated a price of $22,000 after taxes, title, & registration. Mark & I were 100% positive we paid $22,000 for that van. Then the salesmen asked us what we wanted our monthly payments to be. (I can’t remember what they were, but we settled on a seven year loan to keep our payments down. Not to worry, we paid the van off in two years!) Again, Mark & I were positive we paid $22,000 for that van.
Once the van was paid off & we got the title, we quickly filed it away without a second glance until the day we were going to trade it in. I looked at the title & low & behold the purchase price listed on the title (NOT including taxes & title) was $27,905! WHAT? That, my friends is what happens when you negotiate monthly payments without checking the salesman’s math! We got who-dood out of nearly $6,000!
This time around, we secured our financing through the bank. (Be sure to shop around for the best interest rate.) In general, the dealerships usually have better interest rates than banks, but we weren’t willing to be fooled a second time around! It saved us a lot of time at the dealership too!
5. Bring a calculator! If you plan on financing through the dealership, bring a calculator or use a payment calculator like this one. This way, you will know if the monthly payments the dealer gives you align with what they should be in reality! I would hate for you to get scammed too!
6. Be careful what you say! I’m not sure if this is true or not, but this article written by an undercover journalist suggests that there is a device on the phones in the showroom that can allow the salesmen to listen in on your conversations while they are away discussing things with their manager. Even if it’s not true, the less you say, the better! (But if it is true, I would definitely suggest some interesting conversations while the salesman is away… “Shew, I am having some bad gas today!)
7. September through December are the best months to buy a new car according to Street Smart Car Deals. During this time, dealers are trying to clear their lots of the old models to make room for the new year’s model. This site also says no matter what month you go, the last week of the month seems to be the best time, since one more sale could reap the salesman a nice bonus.
Lucky for us, dealers are making room for the 2013 models, so we were able to purchase a new 2012 model for a great price.
8. Consider negotiating the price online. Once we had done our research, we ended up getting quotes online. We then called the dealer that gave us the best quote & gave him our “top dollar” & asked if he could find us something that met our needs for that price. To be honest, our top dollar was pretty low, so we ended up having to pay $500 more. We called back that first salesman we had gone to (the one that didn’t give us a price) & asked if he could beat it. We knew we must be getting a good deal when he called back to say he couldn’t beat it!
Once we got to the dealer, we went for a quick test drive, signed some paperwork, & left in our shiny new van! Much less stressful than our previous van’s purchase.
9. Here are some more great resources for buying a new car:
10. If you get the chance, consider reading the article Confessions Of a Car Salesman. It’s an article written by a journalist that went undercover as a car salesman. It is pretty eye opening & reads like a novel! Mark & I never finished it, but it was so juicy we still plan on reading the rest of it even though we already bought a car!
That pretty much sums up our car buying experience. Hopefully we won’t have another one for a very long time! In my opinion, buying a car is worse than getting a tooth pulled! So, did I leave anything out? Do you have any great tips for buying a new car? Did you learn anything new? I’d love to hear your thoughts!
We drove to the dealer, test drove a van, & sat down to negotiate the price. My husband asked what their best price was, and after the salesman “checked with his manager” came back to tell us he couldn’t give us a price. His explanation was that if they gave us a price & then we went down the road to the next dealership that they would just beat it by $100 & we would get the car from them. Instead of being the first price we got, they wanted to be the last, so they could give us the best deal & we would buy from them.
While this made sense, it left us frustrated. My husband came home & spent several hours researching how the car industry works so he could get us the best deal possible.

Here are some tips for buying a new car, as well as some things we learned along the way:
1. Choose a car. What type of car do you want? What features are you looking for? Make a list of your “must haves” & then do a search for the “best” car in that category. We wanted a safe van that could seat eight & had two power sliding doors that would hopefully last a long time. Over & over again in our searches, the Toyota Sienna seemed to be the best van to meet our needs.
2. Once you know what model you want, check prices online. Many dealerships list the MSRP, as well as lower online prices. Check out local dealerships online to see their prices, as well as the fair purchase price on Kelley Blue Book’s website. You may even want to print out some of these prices for proof!
3. Learn the value of your trade-in. If you will be trading a vehicle in, check out an estimate of it’s worth at Kelley Blue Book.
4. Consider getting a loan through your bank. Some of our research hinted that when you finance through a dealer, you sometimes pay more than you think you are for a car. Okay, that sounds confusing. Let me explain…When we bought our van eight years ago, we financed through the dealer. We got a great interest rate & negotiated a price of $22,000 after taxes, title, & registration. Mark & I were 100% positive we paid $22,000 for that van. Then the salesmen asked us what we wanted our monthly payments to be. (I can’t remember what they were, but we settled on a seven year loan to keep our payments down. Not to worry, we paid the van off in two years!) Again, Mark & I were positive we paid $22,000 for that van.
Once the van was paid off & we got the title, we quickly filed it away without a second glance until the day we were going to trade it in. I looked at the title & low & behold the purchase price listed on the title (NOT including taxes & title) was $27,905! WHAT? That, my friends is what happens when you negotiate monthly payments without checking the salesman’s math! We got who-dood out of nearly $6,000!
This time around, we secured our financing through the bank. (Be sure to shop around for the best interest rate.) In general, the dealerships usually have better interest rates than banks, but we weren’t willing to be fooled a second time around! It saved us a lot of time at the dealership too!
5. Bring a calculator! If you plan on financing through the dealership, bring a calculator or use a payment calculator like this one. This way, you will know if the monthly payments the dealer gives you align with what they should be in reality! I would hate for you to get scammed too!
6. Be careful what you say! I’m not sure if this is true or not, but this article written by an undercover journalist suggests that there is a device on the phones in the showroom that can allow the salesmen to listen in on your conversations while they are away discussing things with their manager. Even if it’s not true, the less you say, the better! (But if it is true, I would definitely suggest some interesting conversations while the salesman is away… “Shew, I am having some bad gas today!)
7. September through December are the best months to buy a new car according to Street Smart Car Deals. During this time, dealers are trying to clear their lots of the old models to make room for the new year’s model. This site also says no matter what month you go, the last week of the month seems to be the best time, since one more sale could reap the salesman a nice bonus.
Lucky for us, dealers are making room for the 2013 models, so we were able to purchase a new 2012 model for a great price.
8. Consider negotiating the price online. Once we had done our research, we ended up getting quotes online. We then called the dealer that gave us the best quote & gave him our “top dollar” & asked if he could find us something that met our needs for that price. To be honest, our top dollar was pretty low, so we ended up having to pay $500 more. We called back that first salesman we had gone to (the one that didn’t give us a price) & asked if he could beat it. We knew we must be getting a good deal when he called back to say he couldn’t beat it!
Once we got to the dealer, we went for a quick test drive, signed some paperwork, & left in our shiny new van! Much less stressful than our previous van’s purchase.
9. Here are some more great resources for buying a new car:
10. If you get the chance, consider reading the article Confessions Of a Car Salesman. It’s an article written by a journalist that went undercover as a car salesman. It is pretty eye opening & reads like a novel! Mark & I never finished it, but it was so juicy we still plan on reading the rest of it even though we already bought a car!
That pretty much sums up our car buying experience. Hopefully we won’t have another one for a very long time! In my opinion, buying a car is worse than getting a tooth pulled! So, did I leave anything out? Do you have any great tips for buying a new car? Did you learn anything new? I’d love to hear your thoughts!
A Place for Everything
Last week I blogged about how we transformed our linen closet into toy storage. In doing so, I stashed more stuff under the bathroom sink, which in turn created another organizing challenge!
I first started on the medicine cabinet. Here is the before:
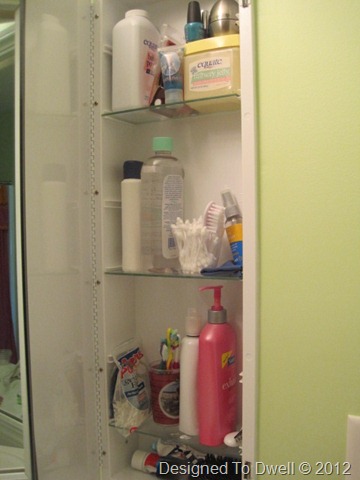
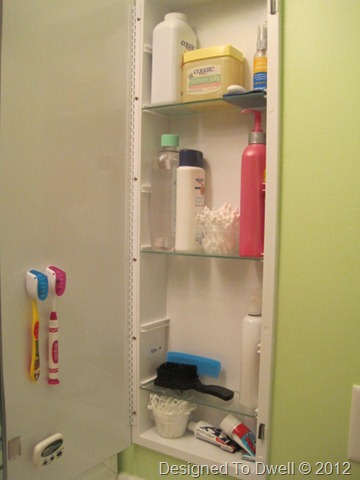
I moved the nail polish to the master bathroom. (Out of sight, out of mind, right?) Then, I placed the q-tips & floss sticks (What are those really called?) into some clear plastic containers. I glued a suction cup to the back of a smaller timer & placed it on the back of the door. (We sometimes use it to monitor how long they shower or brush their teeth.) I found some suction cup toothbrush holders (in the travel toiletry section of Wal-Mart) & also stuck them on the back of the mirror.
Here it is after everything was wiped down & rearranged:
Next, I moved onto the cabinets. Here are some before shots:
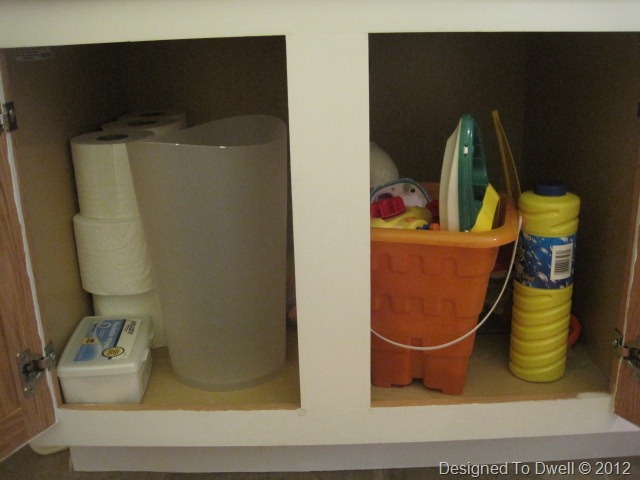
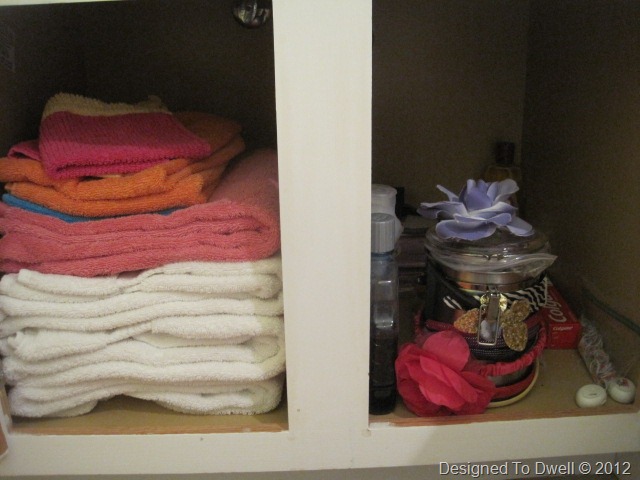
I decided that since all three kids were going to be sharing one bathroom, it would make better sense to give each of them their own cabinet space. It’s not as much of an issue now as it will be when they are older, but I wanted to go ahead & establish their individual bathroom spaces.
To maximize the space in the cabinets, I added some hooks inside each cabinet & hung a plastic basket inside. For now, these are just holding random items, but in the future I see them holding deodorant, perfume, or makeup.
I also had my husband build some cabinet door storage to hold mouthwash, shampoo, conditioner, hairspray, shaving cream, bubble bath, and any other products they may use when they are older.
Here are the cabinets after adding some storage:
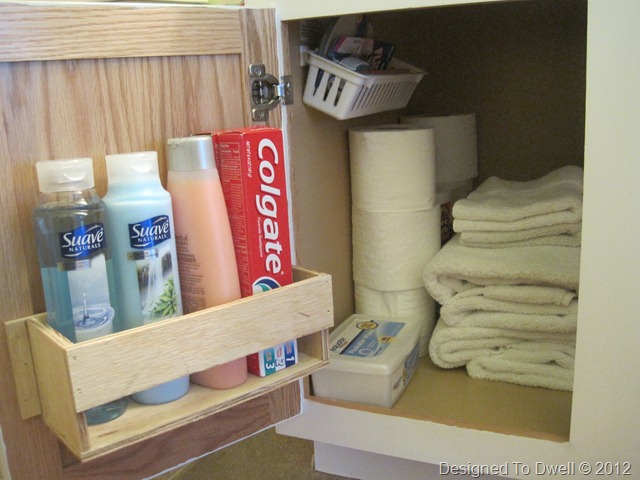
This is the cabinet closest to the toilet. It holds extra toilet paper & toiletries, as well as guest towels.
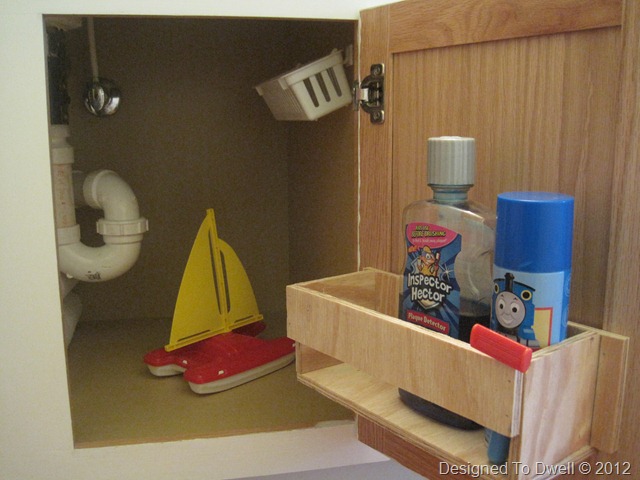
Next to the supply cabinet is Zeke’s cabinet. For now it contains his bath toys, mouth wash, & toy shaving accessories!
I decided to designate the other set of side-by-side cabinets for the girls.
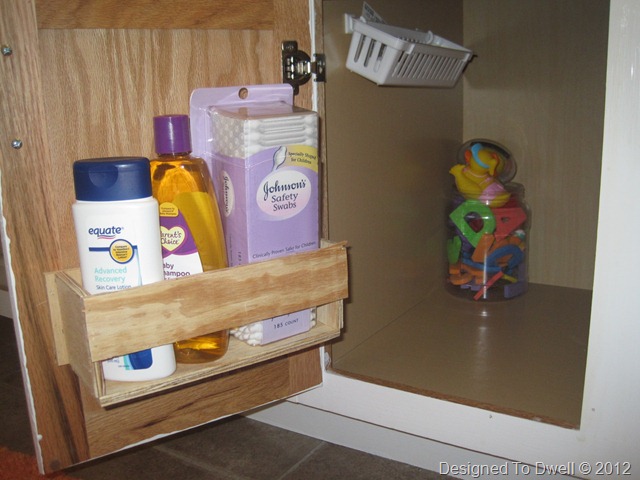
The baby’s cabinet holds her bath toys & special bath time products.
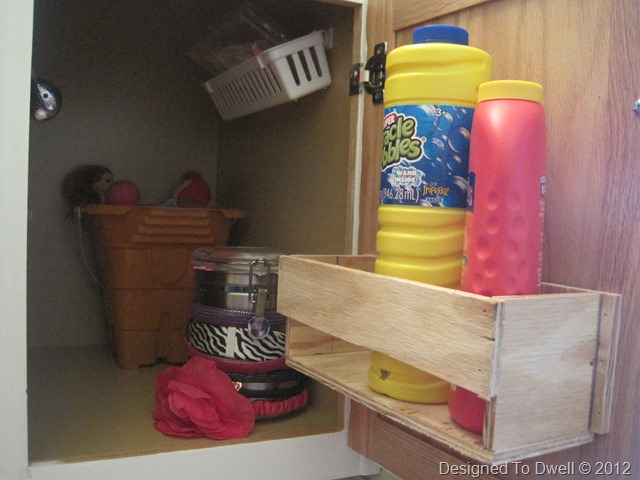
Elie’s cabinet contains her bath toys, hair accessories, bubble bath, & play makeup.
Well, that’s it for now. Are your under sink cabinets crammed full of stuff or nice & organized? Do you have any clever storage solutions for containing the bathroom clutter?
I first started on the medicine cabinet. Here is the before:

I moved the nail polish to the master bathroom. (Out of sight, out of mind, right?) Then, I placed the q-tips & floss sticks (What are those really called?) into some clear plastic containers. I glued a suction cup to the back of a smaller timer & placed it on the back of the door. (We sometimes use it to monitor how long they shower or brush their teeth.) I found some suction cup toothbrush holders (in the travel toiletry section of Wal-Mart) & also stuck them on the back of the mirror.
Here it is after everything was wiped down & rearranged:

Next, I moved onto the cabinets. Here are some before shots:


I decided that since all three kids were going to be sharing one bathroom, it would make better sense to give each of them their own cabinet space. It’s not as much of an issue now as it will be when they are older, but I wanted to go ahead & establish their individual bathroom spaces.
To maximize the space in the cabinets, I added some hooks inside each cabinet & hung a plastic basket inside. For now, these are just holding random items, but in the future I see them holding deodorant, perfume, or makeup.
I also had my husband build some cabinet door storage to hold mouthwash, shampoo, conditioner, hairspray, shaving cream, bubble bath, and any other products they may use when they are older.
Here are the cabinets after adding some storage:

This is the cabinet closest to the toilet. It holds extra toilet paper & toiletries, as well as guest towels.

Next to the supply cabinet is Zeke’s cabinet. For now it contains his bath toys, mouth wash, & toy shaving accessories!
I decided to designate the other set of side-by-side cabinets for the girls.

The baby’s cabinet holds her bath toys & special bath time products.

Elie’s cabinet contains her bath toys, hair accessories, bubble bath, & play makeup.
Well, that’s it for now. Are your under sink cabinets crammed full of stuff or nice & organized? Do you have any clever storage solutions for containing the bathroom clutter?
Garage Organization
Today, I decided to re-visit the garage organization, since it is the most-viewed project on the blog.
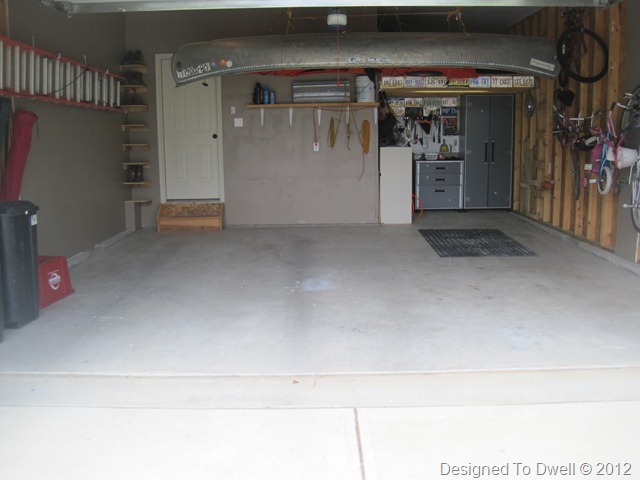
After moving in, clutter had taken over our garage and since this was a new build, there was no shelving or storage to contain the chaos. We worked wall to wall, painting & organizing our way around this room until there was storage for everything.
On the left wall, we hung the ladder using some “L” shaped hooks and used long nails to hold up the camping chairs.
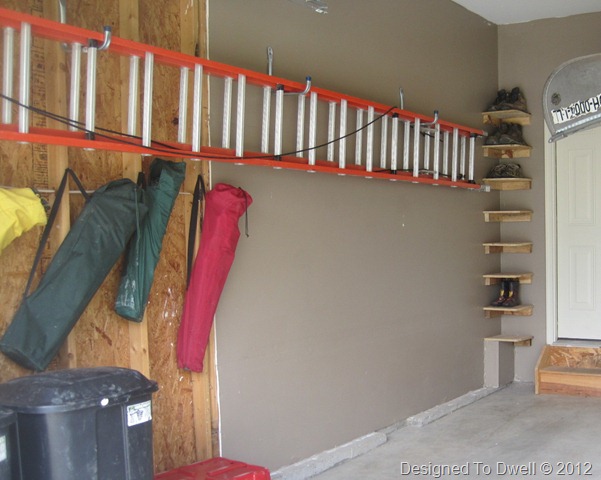
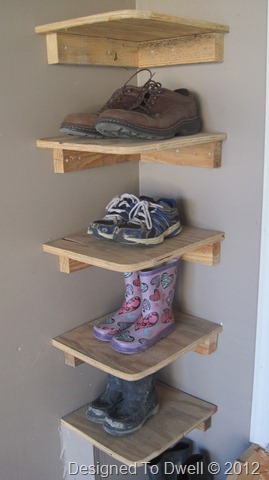
We also made use of the vertical space in a small corner by building shoe shelves for our boots & play shoes. My husband cut some shelves from plywood, rounding off the exposed corner & nailed them into wood braces he nailed into the wall. Here’s a closer look at the shelves.
The front wall got a simple shelf made from brackets & a 2x10. It holds random things, bug spray, saw horses, & extension cords (in the bucket). My husband also hung the canoe & kayak, using heavy duty roping, carribeaners, & hooks. This took some trial & error, but now he can unroll the extra rope & lower the boats down when we need to use them. To put them back up, he slips the ropes around each end of the boats & tightly winds the extra rope around the hooks, raising them up again.
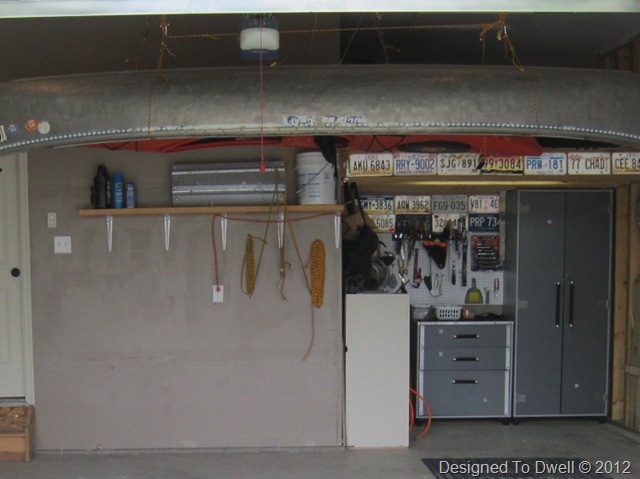
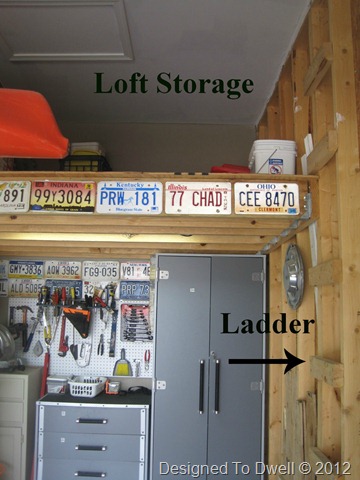
We purchased some storage cabinets & peg board to store my husband’s tools. They set in a recessed area of the garage. The ceiling is quite high (at least 10 feet) so he built a small loft above his workshop area. He added a ladder to the loft by simply nailing 2x4s into the studs.
We used the right wall to store sporting equipment & toys. We hung the bikes with more inexpensive “L” shaped hooks screwed into the studs.
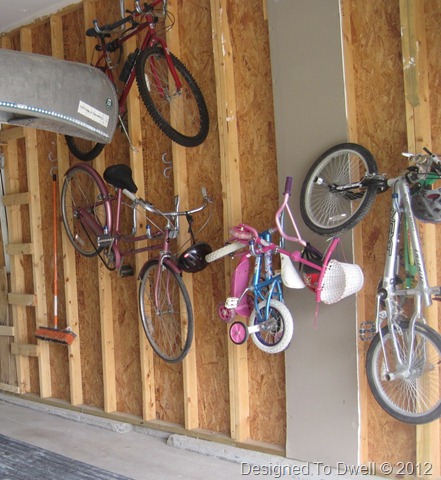
We took advantage of the unfinished walls to store equipment between the studs.
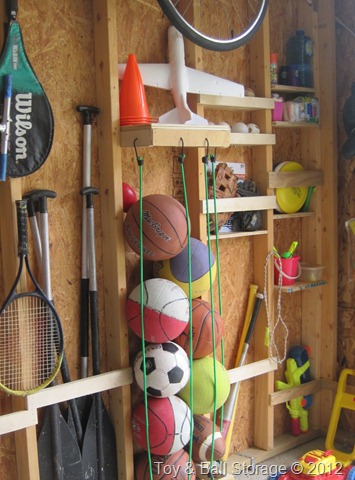
We added slats to the fronts of studs to store boat oars, baseball bats, & water guns. We added shelves & slats to hold baseballs, ball gloves, & Frisbees. We also added plain shelves to hold bubbles & sidewalk chalk.
For the ball storage, we nailed some wood into the studs & then added a piece of wood across them (near the floor & about four feet above). Then we drilled holes into the wood & added three foot bungee cords. The balls stay in nicely & it doesn’t take up much space, since it is built into the studs.
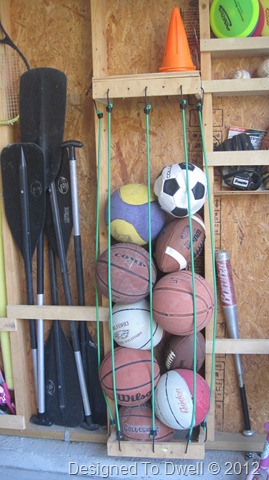
Here is the finished project:
Do you have any clever garage organizing tips? Ever used the space between studs for storage?
Sharing here:


After moving in, clutter had taken over our garage and since this was a new build, there was no shelving or storage to contain the chaos. We worked wall to wall, painting & organizing our way around this room until there was storage for everything.
On the left wall, we hung the ladder using some “L” shaped hooks and used long nails to hold up the camping chairs.

We also made use of the vertical space in a small corner by building shoe shelves for our boots & play shoes. My husband cut some shelves from plywood, rounding off the exposed corner & nailed them into wood braces he nailed into the wall. Here’s a closer look at the shelves.

The front wall got a simple shelf made from brackets & a 2x10. It holds random things, bug spray, saw horses, & extension cords (in the bucket). My husband also hung the canoe & kayak, using heavy duty roping, carribeaners, & hooks. This took some trial & error, but now he can unroll the extra rope & lower the boats down when we need to use them. To put them back up, he slips the ropes around each end of the boats & tightly winds the extra rope around the hooks, raising them up again.

We purchased some storage cabinets & peg board to store my husband’s tools. They set in a recessed area of the garage. The ceiling is quite high (at least 10 feet) so he built a small loft above his workshop area. He added a ladder to the loft by simply nailing 2x4s into the studs.

We used the right wall to store sporting equipment & toys. We hung the bikes with more inexpensive “L” shaped hooks screwed into the studs.

We took advantage of the unfinished walls to store equipment between the studs.

We added slats to the fronts of studs to store boat oars, baseball bats, & water guns. We added shelves & slats to hold baseballs, ball gloves, & Frisbees. We also added plain shelves to hold bubbles & sidewalk chalk.
For the ball storage, we nailed some wood into the studs & then added a piece of wood across them (near the floor & about four feet above). Then we drilled holes into the wood & added three foot bungee cords. The balls stay in nicely & it doesn’t take up much space, since it is built into the studs.

Here is the finished project:

Do you have any clever garage organizing tips? Ever used the space between studs for storage?
Sharing here:


Toy Troubles
About a year ago, I blogged about how we keep the toys out of sight in our family room. That system has been working well, but with Evalyse on the verge of crawling, it’s only a matter of time before the Barbie shoes and Legos become choking hazards for her.
I knew the toys needed to move, but I didn’t know where to put them. Unlike some of our neighbors, we don’t have a loft or an extra bedroom to stash the toys. Our basement is unfinished & the kids rarely go down there to play. I also didn’t want to put the toys in the kids’ bedrooms, since it would be another reason to keep them up at night & they are occasionally sent to their rooms as punishment.
Then, one day I had an “Aha” moment! The upstairs linen closet would be the perfect place to stash their toys! It sits right between their bedrooms.
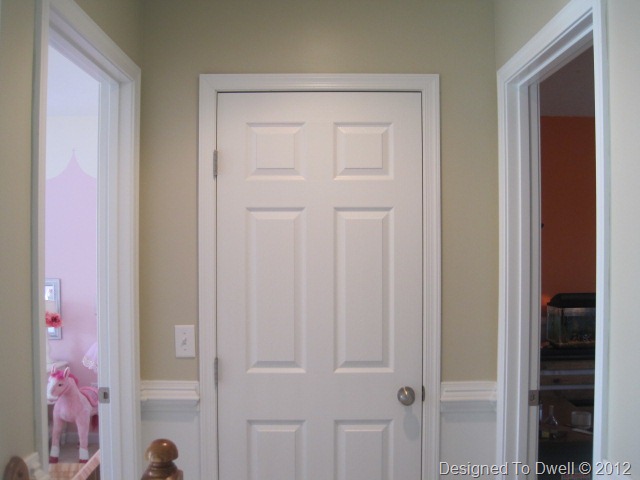
I felt pretty confident that I could find a new home for all it’s contents…
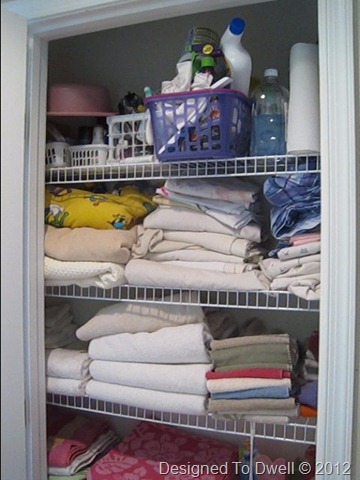
until I started taking everything out!
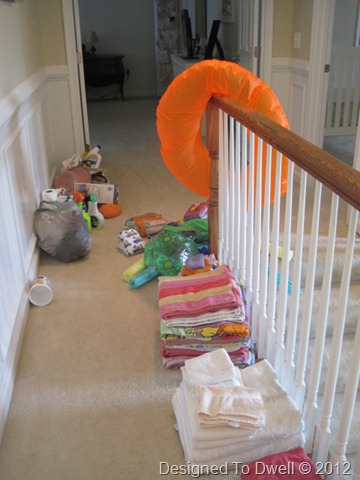
I moved the extra sheets into bedroom closets. I got rid of the old towels & stored the guest towels under the bathroom sinks. Shoe polish and travel toiletries moved to the master bathroom. The first aid supplies got moved downstairs with the rest of the medicines.
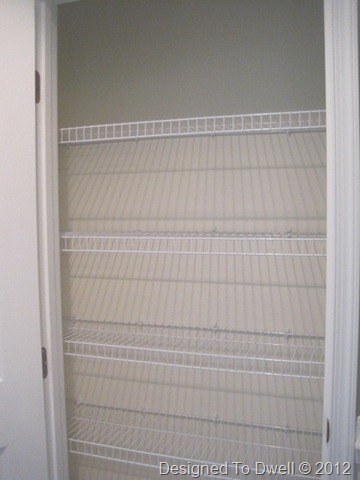
Finally, the closet looked like this:
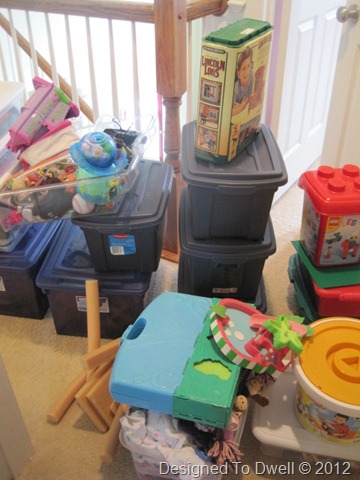
I measured the depth, height, & width of the shelves & purchased containers that would fit the needs for the various toys I would be storing. Then, I brought up all the toys from the family room & began transferring them to the new containers.
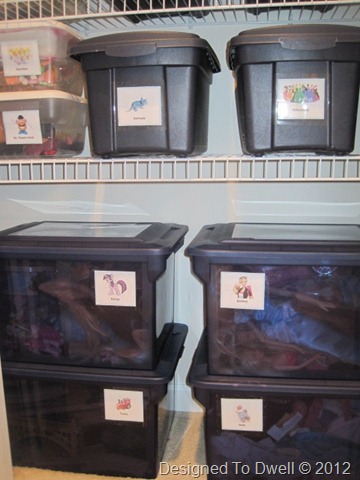
Then, I made simple labels on the computer with pictures of what each bin contained, placed them on the bins, & organized them in the closet.
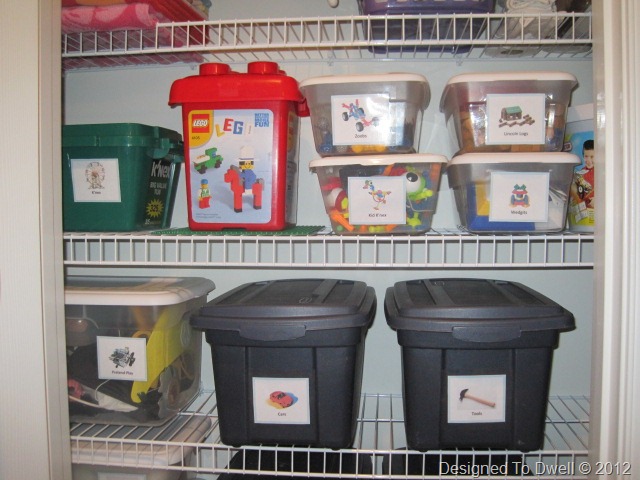
The good news was that I still had room on the top shelf to store the beach towels & cleaning supplies. I added a hook on the door to hold the beach bag.
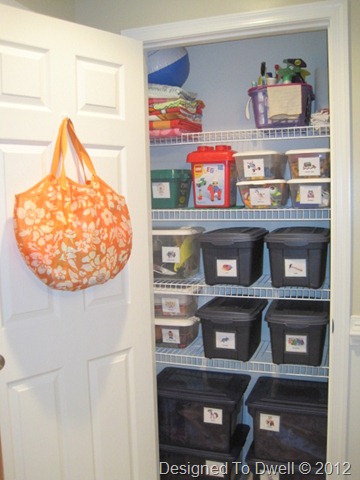
I am loving this toy solution! Not only are the toys far away from where Evalyse plays, but it has also helped keep the main floor much cleaner, since the kids now play upstairs! Once we finish the basement, we will probably reclaim this space as a linen closet, but for now, all is well!
Have you re-purposed any closets in your home lately?
Sharing here:
Organize It Party at Our Fifth House
I knew the toys needed to move, but I didn’t know where to put them. Unlike some of our neighbors, we don’t have a loft or an extra bedroom to stash the toys. Our basement is unfinished & the kids rarely go down there to play. I also didn’t want to put the toys in the kids’ bedrooms, since it would be another reason to keep them up at night & they are occasionally sent to their rooms as punishment.
Then, one day I had an “Aha” moment! The upstairs linen closet would be the perfect place to stash their toys! It sits right between their bedrooms.

I felt pretty confident that I could find a new home for all it’s contents…

until I started taking everything out!

I moved the extra sheets into bedroom closets. I got rid of the old towels & stored the guest towels under the bathroom sinks. Shoe polish and travel toiletries moved to the master bathroom. The first aid supplies got moved downstairs with the rest of the medicines.
Finally, the closet looked like this:

I measured the depth, height, & width of the shelves & purchased containers that would fit the needs for the various toys I would be storing. Then, I brought up all the toys from the family room & began transferring them to the new containers.

Then, I made simple labels on the computer with pictures of what each bin contained, placed them on the bins, & organized them in the closet.


The good news was that I still had room on the top shelf to store the beach towels & cleaning supplies. I added a hook on the door to hold the beach bag.

I am loving this toy solution! Not only are the toys far away from where Evalyse plays, but it has also helped keep the main floor much cleaner, since the kids now play upstairs! Once we finish the basement, we will probably reclaim this space as a linen closet, but for now, all is well!
Have you re-purposed any closets in your home lately?
Sharing here:
Organize It Party at Our Fifth House
Remodelaholic, At the Picket Fence, Be Different, Act Normal, Between Naps on the Porch,
Crayon Freckles, DIY by Design, Evolution of Style, Miss Mustard Seed, My Uncommon Slice of Suburbia,
Serenity Now, Simple Home Life, The DIY Showoff, Thrifty Decor Chick, Somewhat Simple, Tatertots & Jello, Tip Junkie, Home Stories A to Z, Todays Creative Blog, House of Hepworths, The 36th Avenue , Stuff & Nonsense, A Stroll Thru Life
Living Room Laziness
A few days ago, I shared some Living Room Loveliness. Today, however, I am going to show you my living room. Not much has changed in the room since we purchased a new sofa.
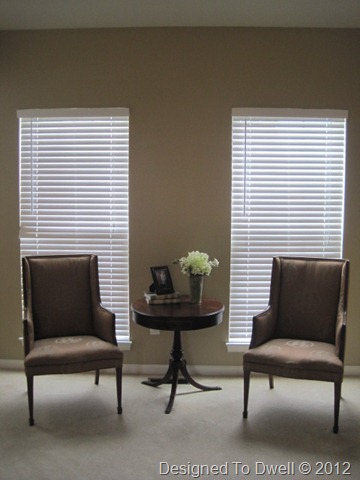
Obviously, I still need to add drapes. I’m hoping for something similar to this print:

I also need to recover those chairs (drop cloths) & add some different accessories to the round table.
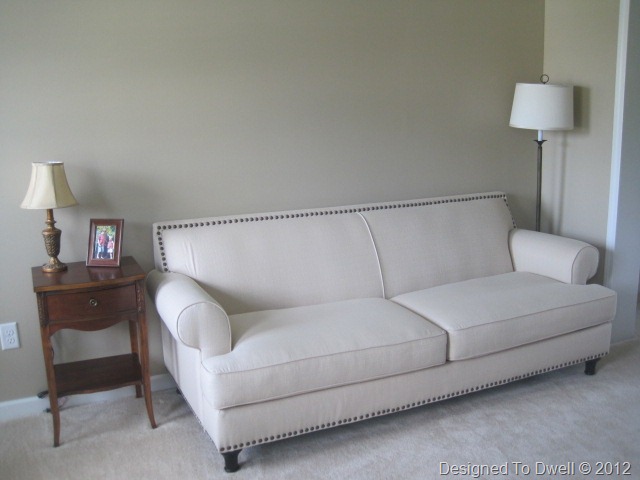
I’m going to ditch the side table & add a large houseplant next to the couch.
Hopefully, I’ll be able to purchase this painting from Garden Ridge & possibly a gallery hanging system to set it up on my wall:

Pillows out of this print would be cute:

and this one…

If they still have it, I’ll use this coffee table from Garden Ridge.

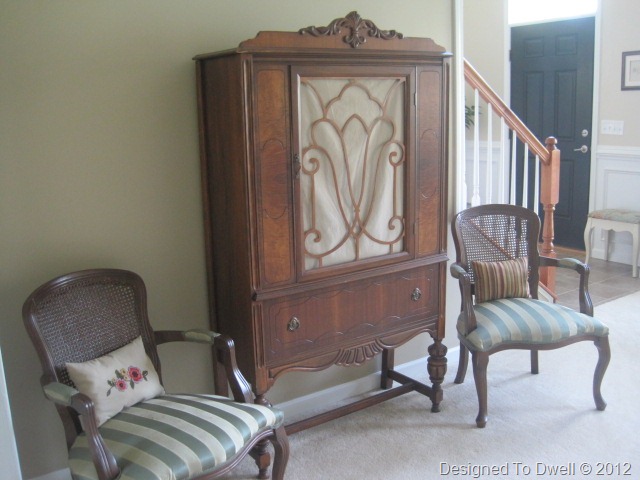
I need to recover these chairs too. Probably just something neutral since I don’t want to recover them anytime soon. Maybe something like this to modernize them.

The china cabinet needs a makeover too. I plan on having Mark replace the top since it is damaged beyond repair & ditch the top wood ornament. Then, I’ll remove the fabric & vineer piece in the door & replace it with a mirror. When all that’s done I’ll decide whether to keep it stained or paint it.
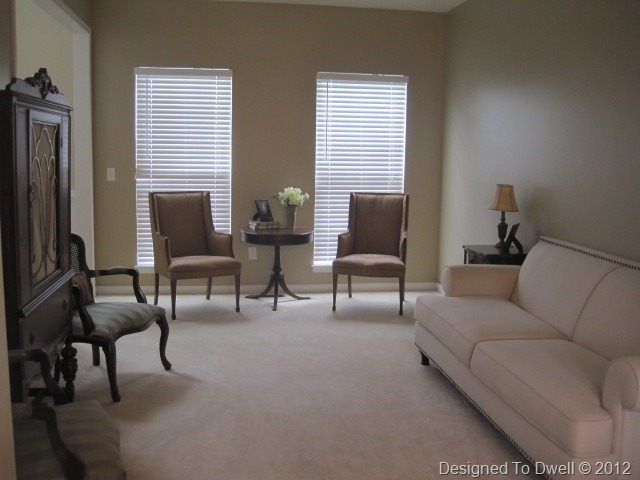
So, what do you think? Can you see my vision for the space? Let’s all cross our fingers it turns out!

Obviously, I still need to add drapes. I’m hoping for something similar to this print:

I also need to recover those chairs (drop cloths) & add some different accessories to the round table.

I’m going to ditch the side table & add a large houseplant next to the couch.
Hopefully, I’ll be able to purchase this painting from Garden Ridge & possibly a gallery hanging system to set it up on my wall:

Pillows out of this print would be cute:

and this one…

If they still have it, I’ll use this coffee table from Garden Ridge.


I need to recover these chairs too. Probably just something neutral since I don’t want to recover them anytime soon. Maybe something like this to modernize them.

The china cabinet needs a makeover too. I plan on having Mark replace the top since it is damaged beyond repair & ditch the top wood ornament. Then, I’ll remove the fabric & vineer piece in the door & replace it with a mirror. When all that’s done I’ll decide whether to keep it stained or paint it.

So, what do you think? Can you see my vision for the space? Let’s all cross our fingers it turns out!
Living Room Lovliness
Now that the dining room is starting to look finished, I am turning my attention to the living room. Here are some beautiful living rooms that caught my eye while searching for inspiration.
This gorgeous living room was designed by Morgan Harrison and featured in New England Home magazine. I love both the modern & traditional elements in the room, along with the pop of color in the flowering branches.
The gold & pink accents in the living room below give it a glamorous feel.
I fell in love will Bill & Jen's house while watching The Little Couple & was so happy to find a tour on Hooked on Houses! The colors in the accessories really give this otherwise neutral room a sense of cheerfulness.
This is a great example of a traditional living room that doesn't feel heavy. Again, I love the pops of color, especially in the flowers.
Laurel-Dawn's living room has a rustic-glam vibe going by pairing more rustic elements like the stone & the chandelier with glamorous ones, like the mirrored coffee table.
The picture below made me realize a china cabinet doesn't have to live in a dining room. I also like the drapery fabric Maria used.
If I could choose any celebrity interior designer to redo my house, it would probably be Sarah Richardson. I love her classic, yet modern style.
Although the walls are a darker tan, this room looks so fresh & bright!
So, which of these rooms are your favorites?
**Please give credit where credit is due & pin from the original source. The link below each picture should take you there!
This gorgeous living room was designed by Morgan Harrison and featured in New England Home magazine. I love both the modern & traditional elements in the room, along with the pop of color in the flowering branches.
The gold & pink accents in the living room below give it a glamorous feel.
**Please give credit where credit is due & pin from the original source. The link below each picture should take you there!
Subscribe to:
Posts (Atom)


